Introduction to MiniDV to Digital Conversion
In an era dominated by digital media, the importance of preserving cherished memories has never been more crucial. As technology evolves, so do the mediums through which we record our experiences. MiniDV tapes, once the go-to format for home videos and amateur filmmaking, now sit in dusty corners, largely forgotten as we transition to digital formats. This article will explore the Minidv to digital process, emphasizing its significance along with providing a comprehensive guide for conversion.
What is MiniDV and Why Convert It?
MiniDV is a digital video format introduced in the late 1990s that provided a compact option for recording high-quality video. These tapes became extremely popular for consumer camcorders due to their affordability and superior quality compared to analog formats. Over the years, however, the landscape of videography has changed dramatically. As digital storage solutions and streaming platforms have emerged, MiniDV tapes have become obsolete. Converting these tapes to a digital format not only facilitates easier access and sharing but also ensures that age-old memories do not deteriorate over time.
Advantages of MiniDV Video Digitization
Preserving your MiniDV tapes in a digital format offers numerous benefits:
- Longevity: Digital files do not suffer from physical wear-and-tear or degradation, unlike tapes, which can deteriorate over time.
- Accessibility: Digital videos can be easily shared across various devices, making it simple to relive moments with family and friends.
- Editing Potential: Digitized footage allows for easy editing and enhancement, giving your videos a polished look.
- Space Efficiency: Storing digital files on hard drives or cloud services is significantly more space-efficient than maintaining a physical collection of tapes.
Overview of the Conversion Process
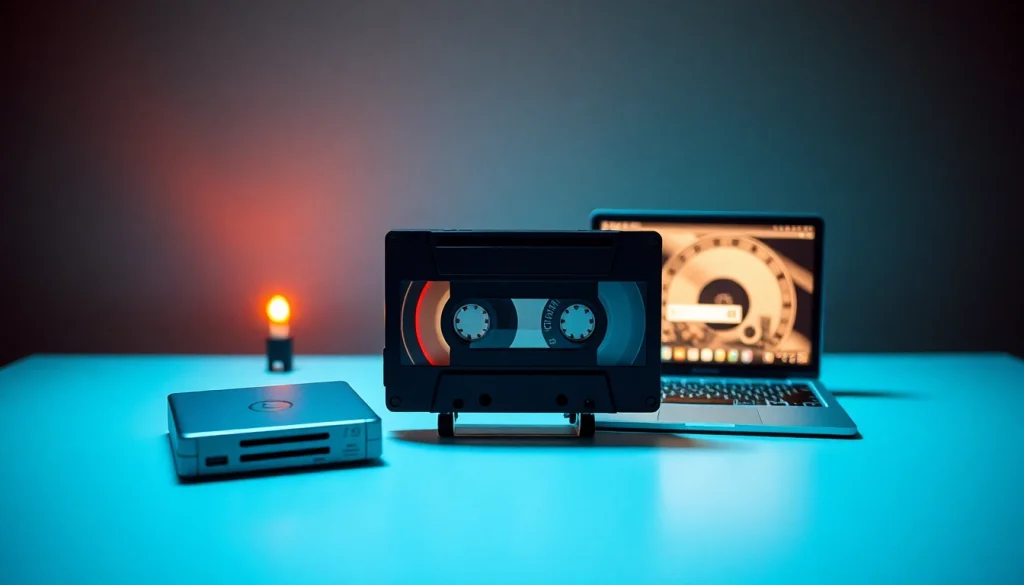
The process of converting MiniDV to digital mainly involves transferring the content from the tape to a computer or digital storage. This generally includes connecting your MiniDV camcorder to a computer, utilizing appropriate software to capture the footage, and saving the acquired video in a suitable digital format. Proper planning and the right tools can simplify this process and ensure high-quality results.
Essential Tools for Converting MiniDV to Digital
Hardware Required for Conversion
To successfully convert MiniDV tapes to digital files, you will need the following hardware components:
- MiniDV Camcorder: A working camcorder that supports playback of MiniDV tapes is essential. If you do not own one, consider renting or borrowing from a friend.
- FireWire Cable: This type of cable is vital for connecting the camcorder to your computer, allowing for a seamless transfer of data.
- Computer with Sufficient Storage Space: Ensure you have a computer equipped with the necessary software and adequate storage available for the videos you plan to store.
- Optional Capture Device: If you don’t have a FireWire port on your computer, USB capture devices are available that can still facilitate video transfer.
Recommended Software for Digitization
Several software options can assist with the digitization process. Here are some reputable suggestions:
- Adobe Premiere Pro: This professional-grade software is excellent for capturing video and offers advanced editing features.
- iMovie: Suitable for Apple users, iMovie provides an intuitive interface for both importing and editing video files.
- Windows Movie Maker: An approachable choice for Windows users looking to edit their captured footage.
- VLC Media Player: A free and reliable choice that can also capture videos from your camcorder.
Alternatives for Those Lacking Equipment
If you do not possess the necessary equipment for converting MiniDV tapes to digital, don’t worry! There are alternatives available:
- Professional Conversion Services: Many companies specialize in converting old video formats into digital. They offer high-quality transfers, taking the burden off your shoulders.
- Local Electronics Stores: Some stores may provide conversion services or can recommend local professionals who do.
- Community Resources: Libraries or community centers might offer access to the required technology for converting MiniDV tapes.
Step-by-Step Guide to Conversion
Connecting MiniDV to Your Computer
Begin by setting up your equipment:
- Ensure your MiniDV camcorder is charged and functional.
- Connect the camcorder to your computer using the FireWire cable or the appropriate USB capture device.
- Power on the camcorder and set it to the correct playback mode.
Using Software to Import Video
With your hardware set up, it’s time to launch your chosen software:
- Select the option to import or capture from a video device.
- Start playing the MiniDV tape while simultaneously starting the capture function in your software.
- Monitor the captured video, ensuring the import proceeds smoothly without glitches.
Saving and Managing Digital Files
After the video footage has been successfully captured, the next steps involve saving and organizing the files:
- Choose an appropriate file format for saving the video. Common formats are MP4, AVI, or MOV.
- Name your file descriptively to make future retrieval easier.
- Create a dedicated folder on your computer to store all the digitized videos for better organization.
Best Practices for Storing Digital Videos
Recommended File Formats for Digital Videos
Choosing the right file format is critical for ensuring the longevity and quality of your digital videos. Consider the following:
- MP4: Highly versatile and widely supported across various devices, making it an ideal choice for most users.
- AVI: Offers high quality but may result in larger file sizes, ideal for archival storage.
- MOV: Preferred by users within the Apple ecosystem, especially for video editing and playback.
Secure Backup and Archiving
To ensure your digital memories are safe, follow these best practices for backup and archiving:
- Use External Hard Drives: Storing copies on external hard drives can protect against hardware failure.
- Cloud Storage: Services like Google Drive, Dropbox, or specialized video archiving services can provide secure remote storage.
- Redundancy: Have multiple backups in different locations to mitigate risks from theft, fire, or other disasters.
How to Share Your Digitized Videos
Sharing your newly digitized videos is easy, thanks to modern technology. Here are some popular methods:
- Social Media: Platforms like Facebook, Instagram, or YouTube make sharing quick and easy with your friends and followers.
- Email: For smaller file sizes, you can send video clips via email; consider using email services that support larger attachments for bigger files.
- Shared Cloud Links: Provide shared access to your videos through cloud services, which can accommodate larger files.
Troubleshooting Common Conversion Issues
Frequent Errors During Conversion
While converting MiniDV tapes to digital, you may encounter some common issues, such as:
- Connection Problems: Ensure all cables are securely connected and that the camcorder is recognized by your computer.
- Tape Playback Issues: If a tape doesn’t play, check for dust or debris on the tape itself or the camcorder mechanism.
- Video Frame Drops: This can happen due to insufficient processing power; close unnecessary programs to optimize performance during capture.
Improving Video Quality
To enhance the quality of your digitized videos, consider the following tips:
- Clean the Tape Heads: Regularly maintaining your camcorder can prevent playback issues and improve overall quality.
- Adjust Settings: Based on your software, use correction features to enhance color, brightness, and contrast.
- Use High-Quality Capture Devices: If experiencing quality loss, invest in a better capture device or professional help.
Tips for a Smooth Conversion
To ensure a hassle-free conversion process, keep the following recommendations in mind:
- Plan Ahead: Determine how many tapes you have and gather your materials before starting the process.
- Test First: Conduct a test capture on a short segment before digitizing an entire tape to ensure everything functions correctly.
- Stay Organized: Maintain a project folder, including different formats, to keep all your treasured memories accessible.
You may also like
-
Effective Strategies to Speed up Windows 11 for Enhanced Performance
-
3D Visualisierung: Techniken, Anwendungen und Trends für modernes Design
-
Ein Leitfaden zur Erstellung hochwertiger 3D visualisierung für Architektur und Design
-
Safeguard Your Inbox: The Advantages of Using a Temporary Email
-
Professionelle Techniken für visuelle Architekturvisualisierung und deren Wirkung