Understanding Well Pump Replacement
What is Well Pump Replacement?
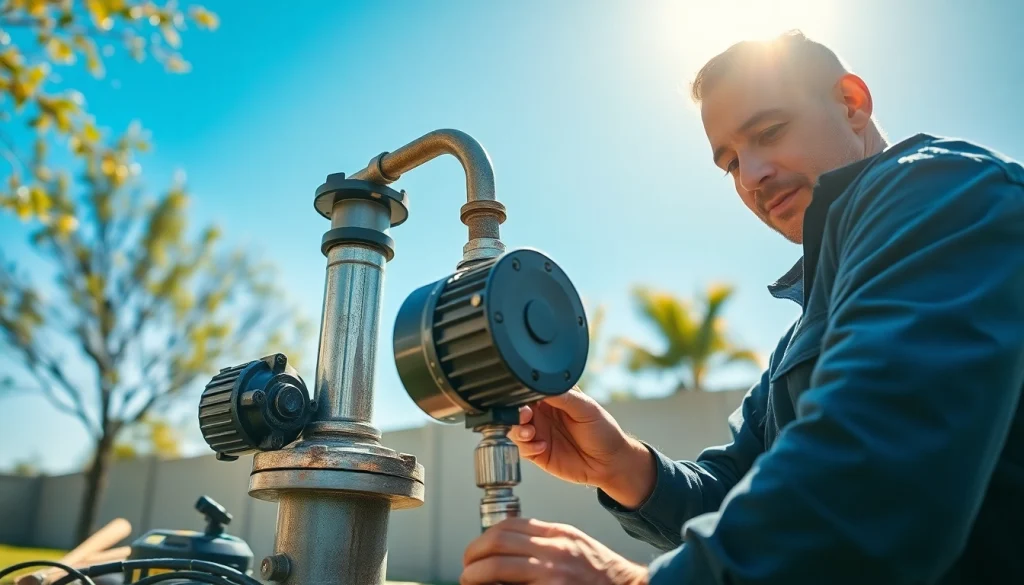
A well pump replacement is the process of removing an old or malfunctioning well pump from a water well system and installing a new pump to restore water flow and pressure. This process can be necessary due to various reasons, including wear and tear, mechanical failure, or upgrading to a more efficient model. Well pumps play a critical role in bringing groundwater to the surface for household use, and understanding when and how to replace them is essential for homeowners relying on well water systems. For more information and expert advice, you can explore well pump replacement.
Signs You Need a Well Pump Replacement
Knowing the signs that indicate the need for a well pump replacement can save you from unexpected problems and costly repairs. Here are some common indicators:
- Inconsistent Water Pressure: If you notice fluctuating water pressure throughout your home or inconsistent water flow, it could signal a malfunctioning pump.
- strange Noises: Unusual sounds such as grinding, rattling, or humming noises coming from the pump can indicate mechanical issues.
- Increased Energy Bills: An inefficient or failing pump may draw more energy, leading to higher electricity bills.
- No Water Supply: If your system stops delivering water entirely, it is essential to diagnose whether it’s a pump failure.
- Age of the Pump: If your well pump is over 10 years old, it’s wise to consider replacement, especially if you experience any of the previous issues.
Types of Well Pumps and Their Lifespans
There are several types of well pumps, each designed for specific applications and depths. Understanding these types can help you choose the right replacement pump.
- Submersible Pumps: Great for deep wells, submersible pumps are placed underwater and can lift water from significant depths. They typically last 10 to 15 years.
- Jet Pumps: Used primarily for shallow wells, jet pumps rely on suction to draw water. Their lifespan ranges from 7 to 10 years.
- Hand Pumps: Often a backup option, hand pumps use manual power to extract water. They can last for decades with proper maintenance.
- Convertible Jet Pumps: These pumps can be used in both shallow and deep well applications, with a similar lifespan to jet pumps.
Cost Factors in Well Pump Replacement
Average Cost of Well Pump Replacement
The cost of replacing a well pump can vary widely based on several factors, including the type of pump, the depth of the well, labor costs, and additional materials needed. Generally, homeowners can expect to pay between $1,800 and $3,000 for a professional replacement, but costs can escalate for deeper wells or specialized pumps. On average, many service providers quote between $2,800 to $6,000, which includes the cost of labor and materials.
DIY vs. Professional Well Pump Replacement Costs
Choosing between a DIY approach and hiring a professional can significantly affect the overall cost of well pump replacement. If you have the skills and tools, replacing the pump yourself can save you labor costs, but you need to factor in the price of the pump and any additional supplies. Professional installation ensures that the pump is correctly installed, minimizes the risk of future issues, and can be worth the investment if you lack experience. Costs associated with professional installation can range from $1,000 to $2,500, depending on the complexity.
Hidden Costs to Consider
When budgeting for a well pump replacement, consider the following hidden costs that might arise:
- Permit Fees: Many localities require permits for well work, adding to your costs.
- Additional Repairs: If the well casing or wiring is damaged, repairs might be necessary before or during pump replacement.
- Upgrades: If you’re upgrading to a more powerful pump, new wiring and pressure switch adjustments might be required.
- Water Testing: Post-installation, it is advisable to test your water to ensure safety and quality, which may include additional costs.
Step-by-Step Guide to Well Pump Replacement
Preparing for the Replacement Process
Preparation is key to a successful well pump replacement. Follow these steps before starting the process:
- Diagnose the Issue: Ensure that the pump is indeed the problem before proceeding with replacement.
- Gather Necessary Information: Know the specifications of your existing pump, such as horsepower, depth, and flow rate requirements.
- Acquire Permits: Contact your local government to check if you need any permits for the replacement work.
Tools Required for Well Pump Replacement
Having the right tools at your disposal will facilitate a smoother replacement process. Here’s a list of common tools needed:
- Socket wrench set
- Pitless adapter wrench
- Impact drill
- PVC pipe cutter
- Standard wrench set
- Safety gear (gloves, goggles, etc.)
- Optional: hoist or winch for submersible pumps
Installation Steps: A Detailed Walkthrough
Here’s a basic overview of the steps involved in the installation process:
- Power Down: Always start by disconnecting the power supply to the well pump.
- Pipes and Wiring: Disconnect any pipes and wiring attached to the pump.
- Remove the Old Pump: Depending on the type of pump, you may need to lift it out with a hoist or winch.
- Install the New Pump: Carefully position the new pump into the well casing, ensuring it’s aligned correctly.
- Reconnect Pipes and Wiring: Follow the wiring diagram to reconnect the pump to the power supply and reseal the pipes.
- Power Up: Turn the power back on to test the pump functionality.
Choosing the Right Well Pump
Factors to Consider When Selecting a New Pump
Choosing the right replacement well pump involves considering multiple factors to ensure compatibility and efficiency:
- Well Depth: The depth of your well will determine the type of pump needed.
- Water Demand: Estimate the daily water requirement of your household to choose an appropriately rated pump.
- Flow Rate: This is measured in gallons per minute (GPM) and should match your household needs.
- Power Options: Determine whether your existing electrical setup can handle the horsepower of the new pump.
Importance of Matching Horsepower and Flow Rates
Understanding the significance of horsepower (HP) and flow rates is essential for effective pump selection. A pump with insufficient power may not deliver enough water to meet household demands, leading to frustration and wear over time. Conversely, an oversized pump can lead to short cycling, which may cause premature failure. It’s crucial to consult specifications closely and, if needed, work with a professional to accurately match pump capacity with your needs.
Top Brands and Models for Well Pump Replacement
While specific brands are not mentioned, when researching pumps, it’s wise to consider models that are widely recommended based on reviews and durability. Look for pumps with solid warranties and good customer service features, as they can reflect the brand’s commitment to quality and longevity.
Maintenance Tips Post-Well Pump Replacement
Routine Maintenance to Extend Pump Life
After installing a new well pump, implementing a proactive maintenance routine can significantly extend its lifespan. Here are some practical tips:
- Regular Inspections: Schedule periodic checks on the system to identify any early signs of wear or malfunction.
- Clean Filters: If your system includes filters, clean or replace them according to the manufacturer’s recommendations.
- Monitor Output: Keep an eye on water pressure and flow rates to ensure that the pump operates efficiently.
Common Issues After Replacement and How to Fix Them
Even after a successful replacement, you may encounter some issues. Here’s how to address common post-installation problems:
- Low Water Pressure: Verify the pressure switch settings and inspect for leaks in the plumbing.
- Frequent Cycling: This can indicate a problem with the pressure tank or a leak in the piping system.
- Noise Issues: Unusual sounds, particularly grinding, may need troubleshooting to ensure components are properly seated.
When to Call in the Professionals for Help
While many can handle routine maintenance and basic issues themselves, knowing when to consult professionals is crucial. If problems persist despite your troubleshooting efforts or if you’re uncertain about the installation process, don’t hesitate to call in an expert. Professional assistance can ultimately save you time and money by ensuring that the work is done right.
You may also like
-
Expert Roofing Replacement in Tigard Oregon: Elevate Your Home’s Value
-
Transform Your Outdoor Space with a Modern Steel Pergola
-
Mastering the Art of Interior Decorator Techniques for Your Home
-
Crafting Spaces: The Inspiring Role of an Interior Decorator
-
Maximize Space with a Bicycle Wall Hanger: A Guide to Smart Bike Storage